Introduction to Homebrewing:
 A Time-Honored Hobby for a New Age
If you’re like many people today, you may be looking for a hobby to better enjoy your increased time spent at home. Or maybe you’d like to take the first step toward a career in a fun and thriving industry. Either way, we’re here to help make it easy for you. If you can boil water and make spaghetti without help, you can make beer!
Malt extract brewing is a great place to start. It’s easy, fun and there are a number of ingredient recipe kits available to choose from depending on your preference and taste. Lagers, Ales, IPAs, Stouts – you can brew them all. Don’t be fooled into thinking of this approach as a shortcut or a rookie maneuver – malt extracts can produce fantastic beers! The extract is created from base grains (or malts), and provides the sugars that will turn into alcohol during fermentation. Specialty grains are then used with the extract to add color and impart unique malt flavors and finish to your beer. Choose from a variety of strains of yeast and hops to make your favorite style of beer – or invent your own!
This overview covers the basics of extract brewing with specialty grains to brew a typical 5 gallon batch.
Our Keystone Ingredient Kits come with detailed instructions based on the style of beer you are brewing.
![]()
4 Simplified Steps to Making an Extract Beer
Preparation
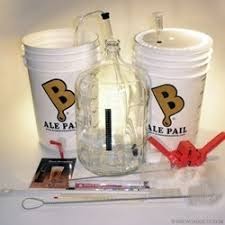
Gather Equipment. This includes at the minimum a stainless steel brew kettle to boil in, a fermenter, lid and airlock, a bottling bucket, stir spoon, hydrometer, auto siphon, bottle brush, cleanser and sanitizer. We’ve conveniently bundled our equipment together in 3 packages so you can get everything you need in one box – a base Starter Equipment Kit, the Brewer’s Essentials Kit and the Master Brewer’s Kit.
The base Starter Beer Equipment kit is available with or without a brew kettle. We also recommend adding a sanitizer, a kettle thermometer and a stirring spoon.
The “Brewer’s Essentials Kit” contains everything in the base kit plus: “How to Brew” book by John Palmer, 5 gallon glass carboy with carboy brush, stopper, airlock, sample thief, plastic spoon, floating thermometer and 8oz bottle of Star San sanitizer. This bundle adds equipment typically purchased by the brewer over and above what is in the base kit.
The “Master Brewer’s Kit” contains everything in the Base kit and the Essentials kit plus: a 6.5 gallon glass fermenter, a funnel, a carboy “hauler” for easy transport, a carboy drying rack, and a 25′ copper wort chiller. This kit provides virtually all of the equipment that a brewer needs.
Gather Ingredients. Our Extract Ingredient Kits come with all the ingredients and directions you need to make the beer. These are tried and true recipes that our staff has made and acquired over the years. All kits make 5 gallons of beer (approximately 2 cases of 12 oz bottles.
Clean and Sanitize. It is very important that equipment is clean and sanitized before using. This is especially important for anything that touches the beer after the boil including fermentation bucket, lid, airlock, stirring spoon, carboys, hoses, funnels, etc. Sanitizing your equipment prevents microorganisms from spoiling your beer and we have a number of cleansers and sanitizers to help you achieve the best results.
Brewing
See your kit’s recipe sheet for specific instructions
Steeping Grains. Begin by filling your stainless steel brew kettle with 2-1/2 gallons of water. If you have municipal water, consider using spring water from the store instead, as municipal water typically contains chloramine which will affect the taste of your beer. On your stove, heat the water to 160 degrees F, turn the burner off. Add the steeping grains to the grain bag provided in your ingredient kit and tie off at the top. Add the bag to the kettle and steep the bag of grains for 30 min. “dunking” occasionally. After steeping, remove and dispose of the bag after letting the excess liquid drip into the brew kettle. Do not squeeze the bag to get all the liquid out – this may produce undesirable flavors from excess tannins.
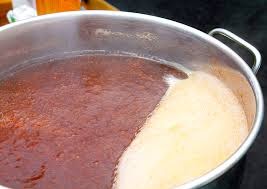
Adding Malt Extract and Hops. Begin by bringing your kettle to a boil. Once boiling, turn the burner off and add the Malt Extract included in your ingredient kit as indicated on the recipe. Once completely dissolved, bring your kettle back to a boil. Watch for foam overs as the kettle reaches boiling and when adding hops. Turn down the burner and use the spoon as needed. Once at a boil, add Hops (in a muslin bag) and other ingredients as called for to the liquid (now called “wort”), adding at the specified times in the recipe. Total boil time is typically 60 minutes.
Cool the Wort. Before transferring to the fermenter and adding (pitching) the yeast, our wort must be cooled down to near room temperature, optimally between 66-72 degrees. This can be done in two ways. The first method is simply filling a sink with ice water and setting your pot in it to cool the wort. Another method is to use a wort chiller that attaches to your sink’s water faucet. It is immersed into the kettle of hot wort and acts as a heat exchanger to cool down your wort quickly. Once the wort is cooled, you may carefully remove the hop bags in the wort using a sanitized spoon and discard them.
Fermentation
Fermentation is the process whereby “sugars” are converted by yeast to alcohol, carbon dioxide, and heat. In the brewing of most traditional beer, the sugars are derived mainly from malted barley, although other cereal sources and other plant sugars can also be used. These materials also contribute proteinaceous substances, which in concert with the sugars and added flavoring agents, notably hops, generate the alcohol, flavors, and aromas that we know and love as beer. Let’s look at the steps to ferment our beer:
➤ Once again, make sure to sanitize the fermenter and anything that touches the beer.
➤ Pour the chilled wort into a sanitized fermenter. Splash and aerate the wort while pouring.
➤Top off the fermenter to the 5 gallon mark by adding additional water once again splashing to aerate. Stir thoroughly with a sanitized spoon to mix and aerate.
➤ In a sanitary manner, remove about a 8 oz sample for testing with a hydrometer if desired.![]()
➤ A hydrometer is a device that measures the amount of sugar in the wort in a scale called “Specific Gravity”. Both a beginning “gravity” reading before fermentation and an ending “gravity” reading after are typically taken. Taking readings helps us to know when fermentation is complete and to know what our abv % is.
➤ Add yeast to the fermenter (after sanitizing the package).
➤ Attach the sanitized fermenter lid and seal.
➤ Fill a sanitized airlock halfway with water and insert in the fermenter lid.
➤ Place the fermenter in a warm place (steady 66-72 degrees) and ferment from 10-14 days.
 Bottling
Once fermentation is complete (usually two weeks), it’s time to bottle your beer.
Clean and Sanitize Everything. This includes the bottling bucket, auto siphon, transfer hoses, bottle filler, bottle caps, bottles.
Boil the 5 oz Priming Sugar included in your ingredient kit in about 8 oz of water to sanitize. Let cool to room temperature and add directly into the sanitized bottling bucket.
Siphon the Beer out of the fermenter using an auto siphon into the bottling bucket, minimizing any splashing. Leave as much of the yeast and hop sediment called “trub” on the bottom of the fermenter behind. Once you’ve transferred all of the beer into the bottling bucket, gently stir the beer to evenly disperse the priming sugar into it. Minimize oxidation by not splashing the beer at this stage.
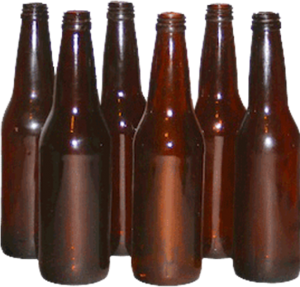
Fill the bottles by attaching the bottle filler to the hose and the hose to the bottling bucket spigot. Open up the spigot and place the bottle filler in the bottle. Press down on the spring loaded bottle filler to start the flow and fill all the way up to the top of the bottle. Pull up to stop the flow. When you remove the bottle filler, it will leave the perfect amount of head space at the top of the bottle.
Cap the bottles with the provided bottle capper and caps.
Store the bottles upright at room temperature 66-75 degrees for about two weeks out of direct light to allow them to carbonate fully.
Serving Tip You’ve made a naturally bottle conditioned beer which will contain a small amount of harmless sediment in the bottom of the bottle. For best clarity, store the bottle upright and slowly decant at an angle, leaving the last little bit in the bottle.
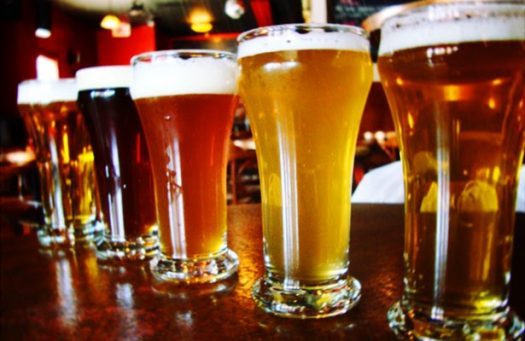
Enjoy That’s it – you’ve made beer. Now just refrigerate and enjoy!
Need more help? Call us at 215-855-0100 with any questions or check out our upcoming beer brewing class schedule to sign up!
Visual learner? The American Homebrew Association has an excellent tutorial here.